

Use Zapier if you want to automate tasks like sending alerts or storing data, without writing a line of code.
Before following the these steps to set up the integration, you must make sure you are invited to use the Open Social Zapier app.
1. Create a Zap
Log into Zapier and click “Create Zap”.
2. Choose Trigger
Search for “Open Social”.
Select Incoming Webhook.
3. Enter Webhook URL and Secret
- Use the secret key we provide (this ensures your Zap will only accept events coming from Open Social).
- Copy the Zapier-generated webhook URL and send it over to us. We'll configure it in the webhook dispatcher.
4. Add actions
Once the trigger is configured, you will be prompted to complete your workflow by adding actions. Some examples of actions you can add:
- Send a Slack notification (e.g., post a message to Slack).
- Store event data (e.g., save to Google Sheets).
- Trigger an email alert (e.g., notify an administrator via Gmail).
The marketplace contains thousands of apps you can integrate in your workflow: https://zapier.com/apps
After adding your actions you can Publish the Zap so it's enabled.
Available data and variables
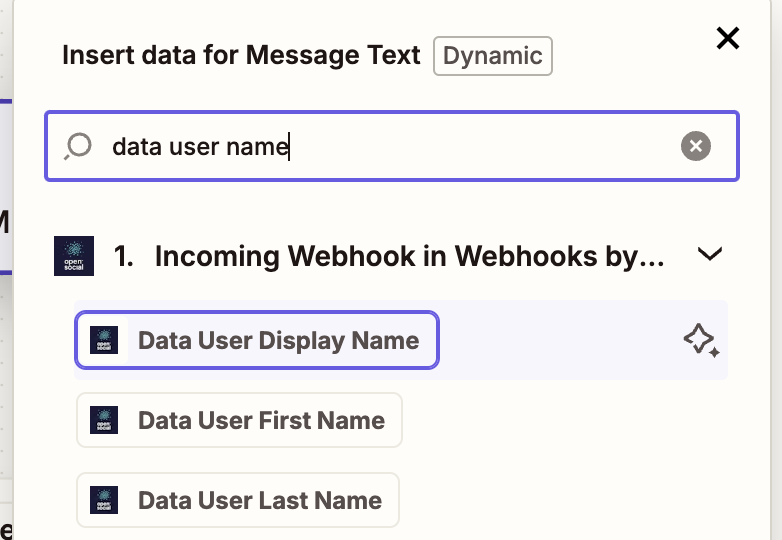
To make the actions more meaningful, Zapier automatically extracts all the data from the webhook, so you can use any variable in the action. These variables are available to be mapped into Google Sheets by clicking on the “Insert Data” button (represented by a {+} token icon) and selecting the corresponding field.
To map each field:
- Click on each column input field;
- Click the {+} icon to open the data selector;
- Select the corresponding webhook data field.
An example
For example, let's say you are creating a Zap to be triggered on an event of type com.getopensocial.cms.user.login (User logged in). According to the documentation the user name is available in the payload at data > user > displayName:
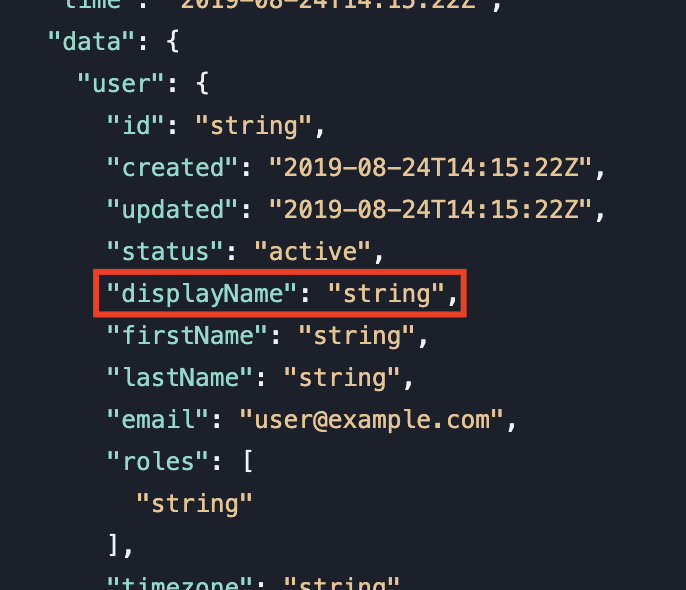
So in Zapier you will be able to use the variable "Data User Display Name"