Event enrollment methods
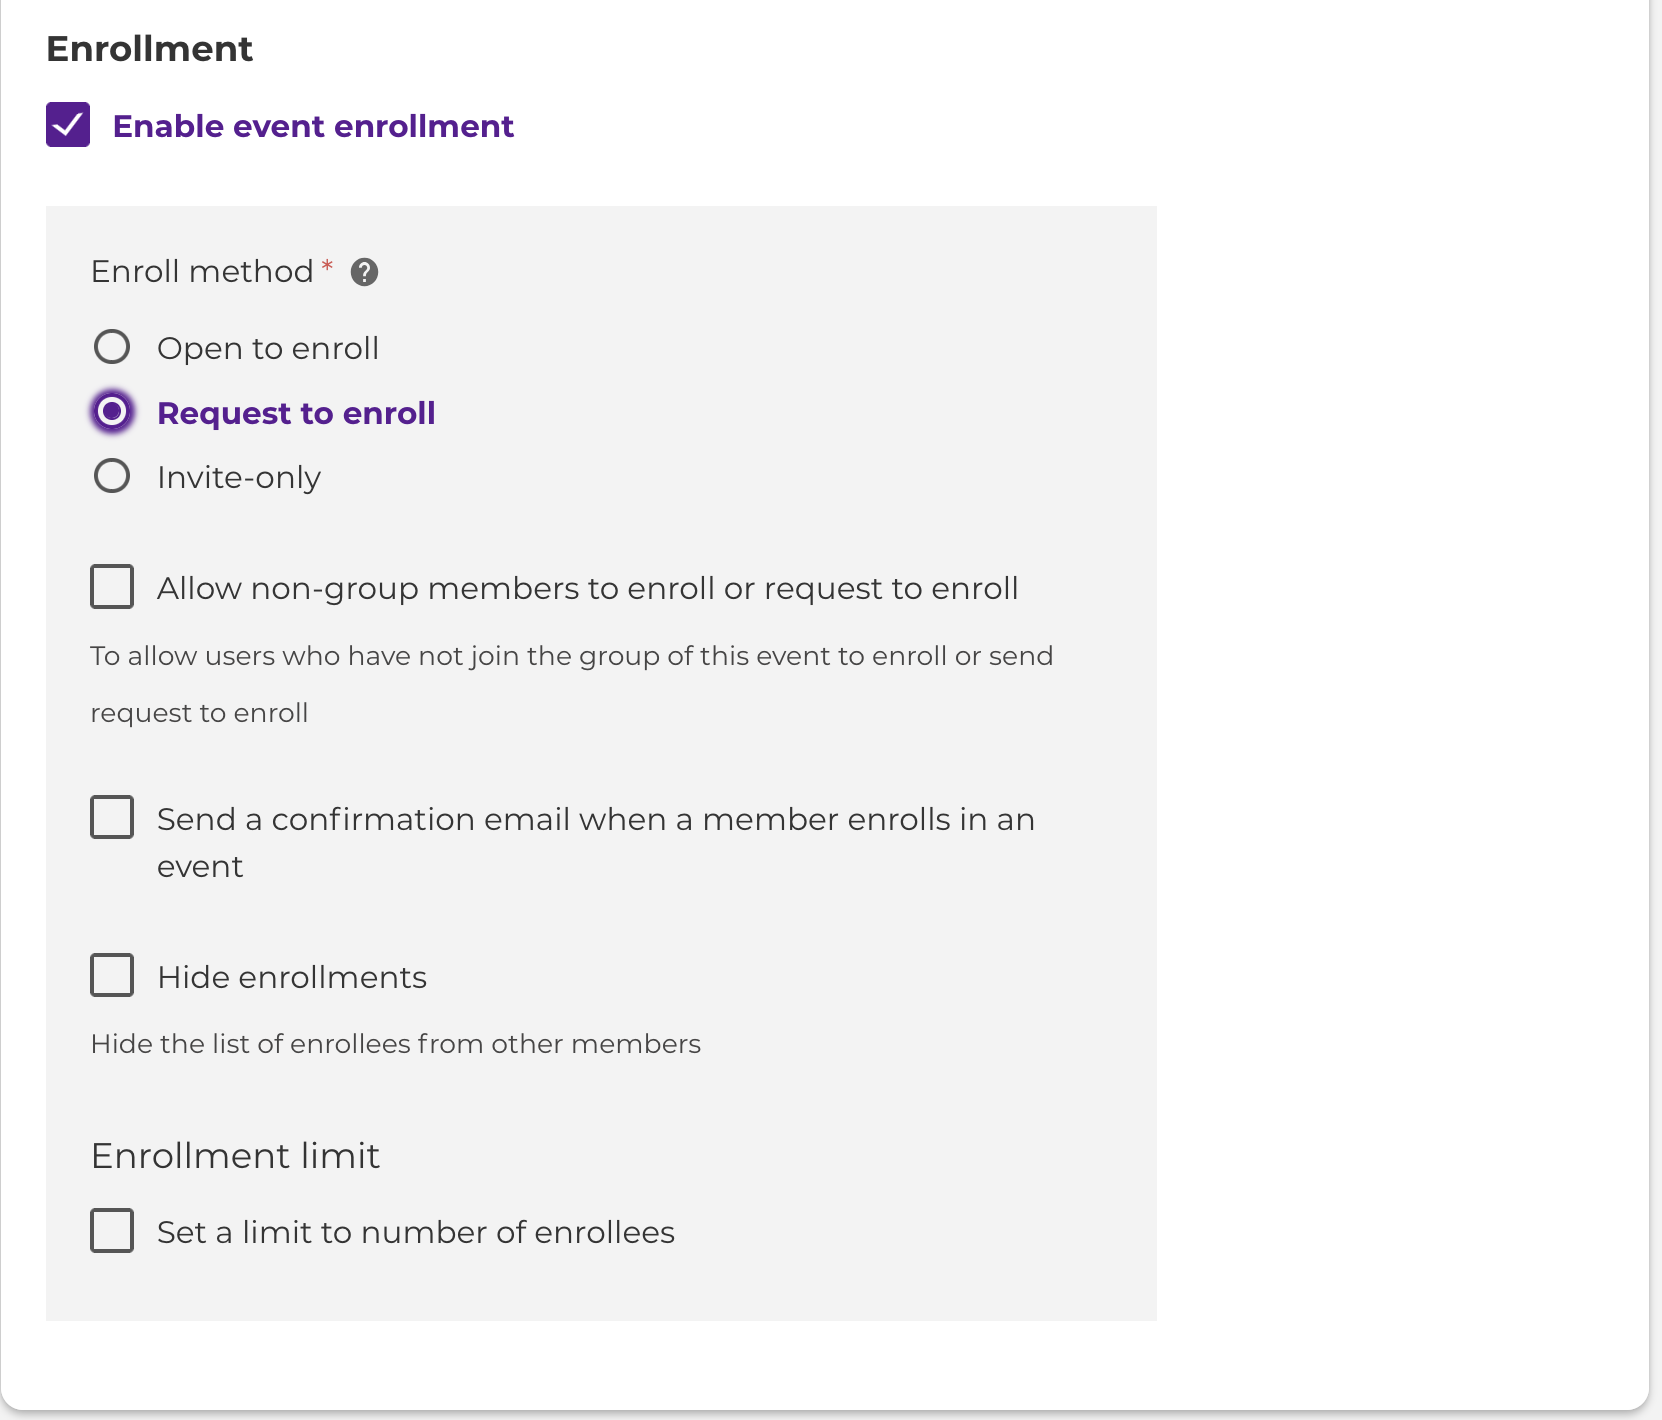
When creating an event, you have three options to choose between how a user can enroll in your event.
- Open to enroll: a user just has to click the enroll button and will automatically be enrolled.
- Request to enroll: a user has to request to enroll, and the event manager has to either approve or decline the request.
- Invitation-only: the event managers send invitations to users for them to join the event. Users cannot enroll without invitation.
Request to Enroll
This feature allows managers or organizers to decline or accept users who want to join an Event.
Event managers are able to structure their events in such a way that others can request an invitation to their event. But the manager of the event can decide to approve or decline this request, keeping them in charge of their attendee list.
When a user creates an event, they can choose the enrollment options.
Users
This turns the Enroll button, into a "Request to Enroll" instead, which the user can click to submit their request - it also gives them a message box in which they can add additional information to their enrollment request.
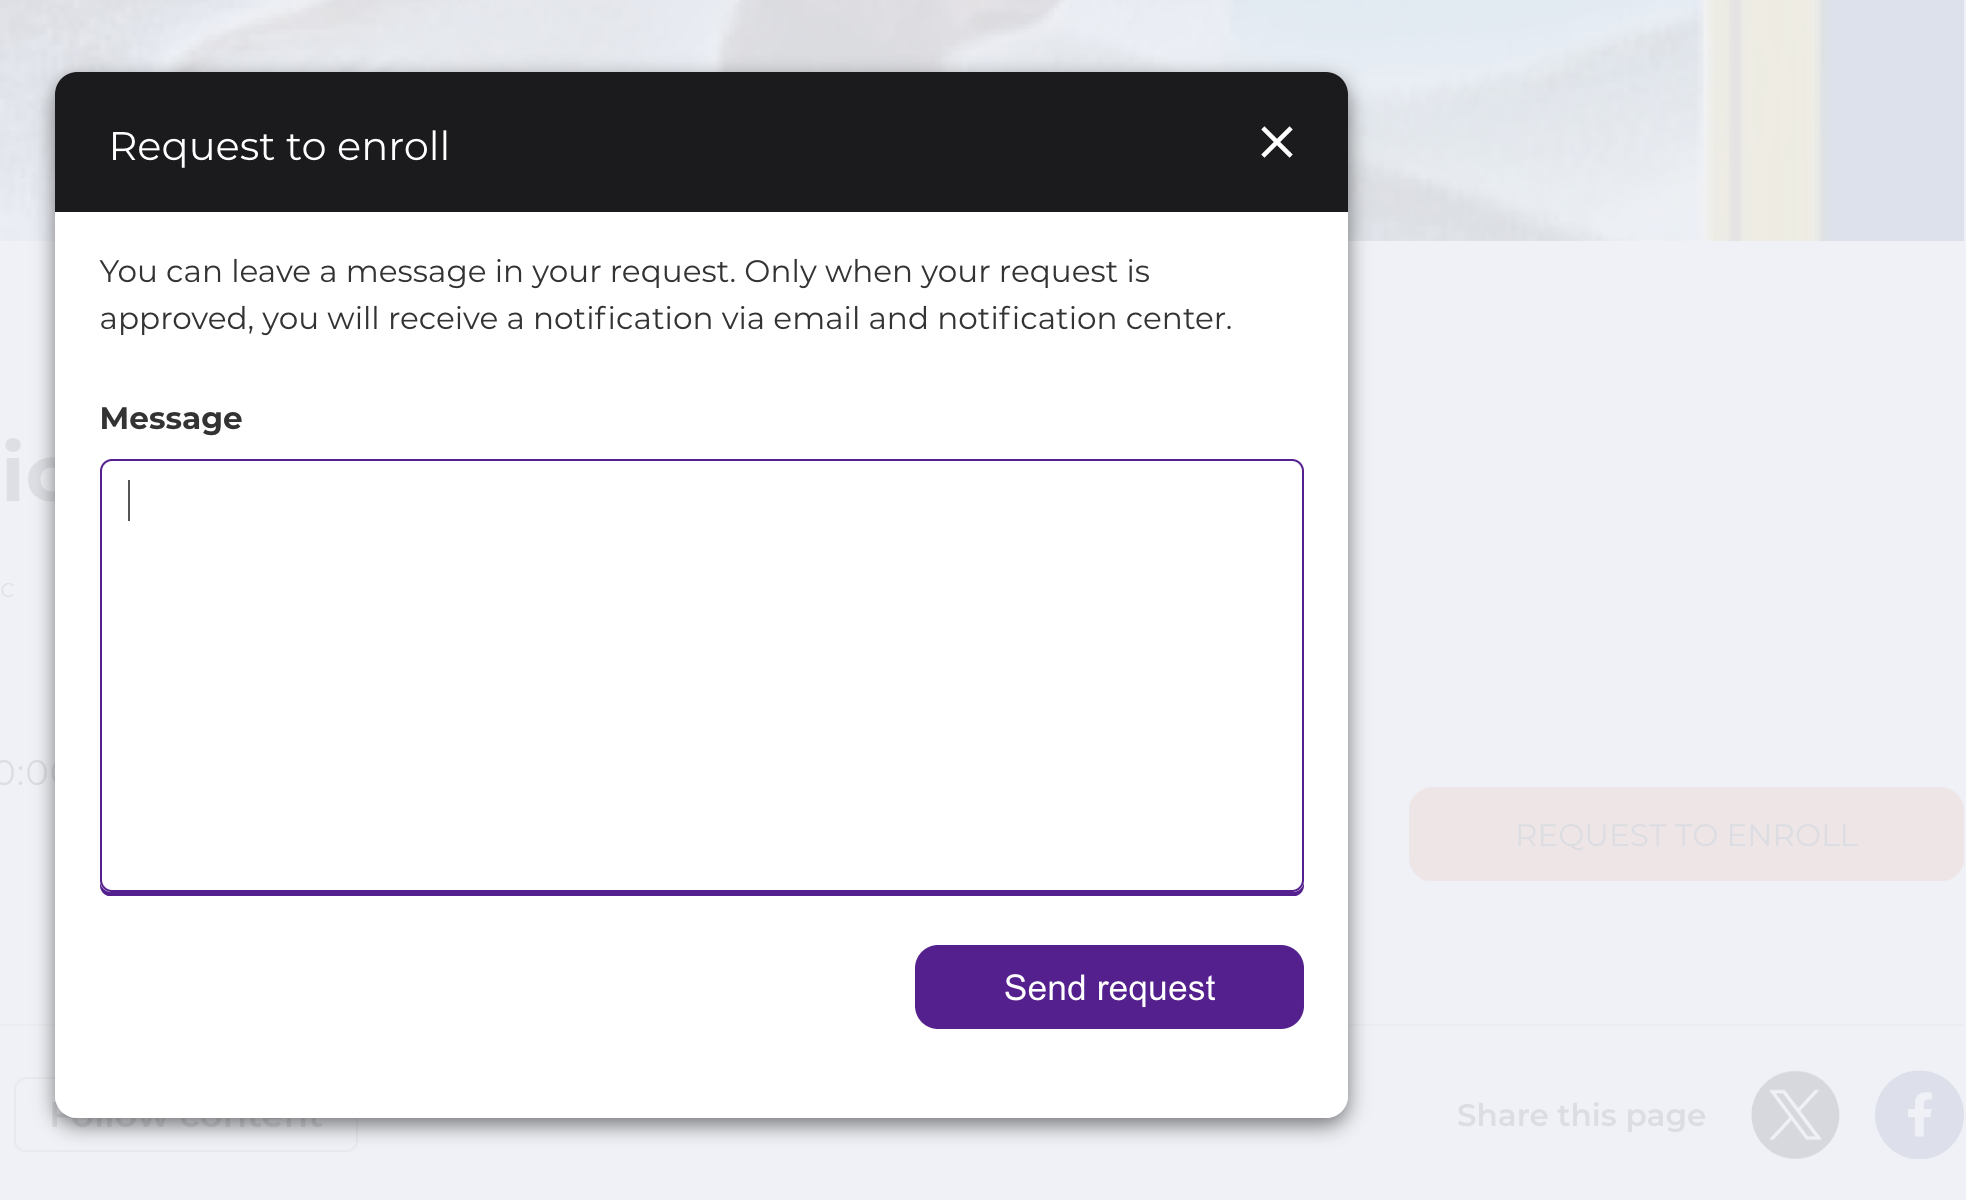

The user still has the opiton to cancel his request to enroll, before the event manager accepts or declines the request - the user will see a pending button.
Event Manager
The EM will be notified about the incoming requests on the event page as well as through the notification center.
The event manager will have to accept or decline these requests themselves, via the

After approving the request, the user is directly added and will receive a notification once their request is approved.
Invitation-only Method
Whether you have members in your community who you’d like to see participating in an event you are organizing or somebody who is not yet a member of the community who definitely doesn’t want to miss out. You can invite new users to the community, directly into your event. Or invite existing members, empowering them to accept your invitation to engage both the community as well as the event you created.
Let's say you’re organizing a reunion with only a limited amount of spots available.
You can now create your event using the Invite-only option. Allowing users to be directly added, or have the organizer send them an invite.
It will accept multiple email addresses and make sure you separate them by a comma or semicolon, as well as autocomplete any existing users you might want to select.

When sending these invites, an email will automatically be sent to all the users with an invitation to either join the event or group directly, the buttons below provide further information on the event/group and on the community.
Before sending the invites, we will show you a collapsible preview of the email for you to check.

In the manage members tab, you have the option to view the status of all your invitations under the add members tab. There you can view who accepted, declined, or is still waiting to confirm or decline your invitation. Or if you change your mind, this is where you would have the option to cancel it.
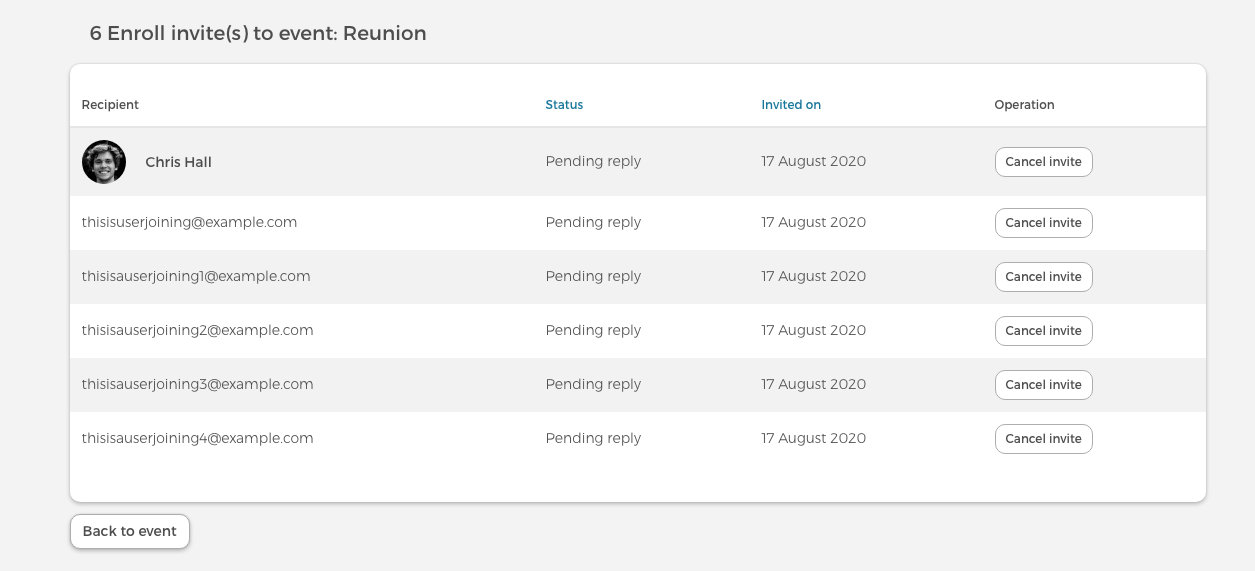
If the invited user is already a member of the platform, like Chris Hall in the example above, they will receive a new invite notification in their notification center. Moreover, they will see a new indicator with a link to an overview of all their invites. This link will direct them to all of the pending invites.


Users who are not yet a member of the platform will just receive the email shown above and will have to complete the registration process first before they can accept or decline the invite, allowing the full circle of invites to complete.