

Engagement Studio manual›Segments›Importing contacts
Why use imports
Until full member and segment sync is available, the import tool in Engagement Studio is a handy way to:
- add new members for the first time;
- update existing members in bulk, for example with tags or segment membership.
This is often easier than filtering and editing members one by one in Engagement Studio, which can be clunky.
Tips for every import
- Keep your CSV simple
- Remove columns you won't use, so the file is clean and easy to map.
- Edit the file in Google Sheets, not Apple Numbers. Numbers can change the file format and cause upload errors.
- Export it as CSV from Google Sheets before you upload it.
- Updating existing members
- If a member already exists in Engagement Studio, importing them again updates or overwrites their fields, especially fields that are still empty.
- You can use this to add tags in bulk, or to add members to segments.
- Because filters in Engagement Studio are limited, updating by import is often easier than editing contacts directly.
- Use the "Keep value if already exists" option with care: on keeps existing values and only fills empty fields; off replaces fields with the values from your import.
- Mapping fields
- Email is required and easy to map.
- First name and last name map directly.
- Common mappings: Function → Position; Organisation → Company Name (important: map to Company Name, not Company or Primary Company).
- Make sure everyone has an organisation, because Engagement Studio handles companies differently from tags.
Basic import: step by step
- Export your member list from the CMS (or prepare it elsewhere).
- Remove columns you don't need: edit in Google Sheets, then export as CSV.
- In Engagement Studio, go to Contacts → Import.
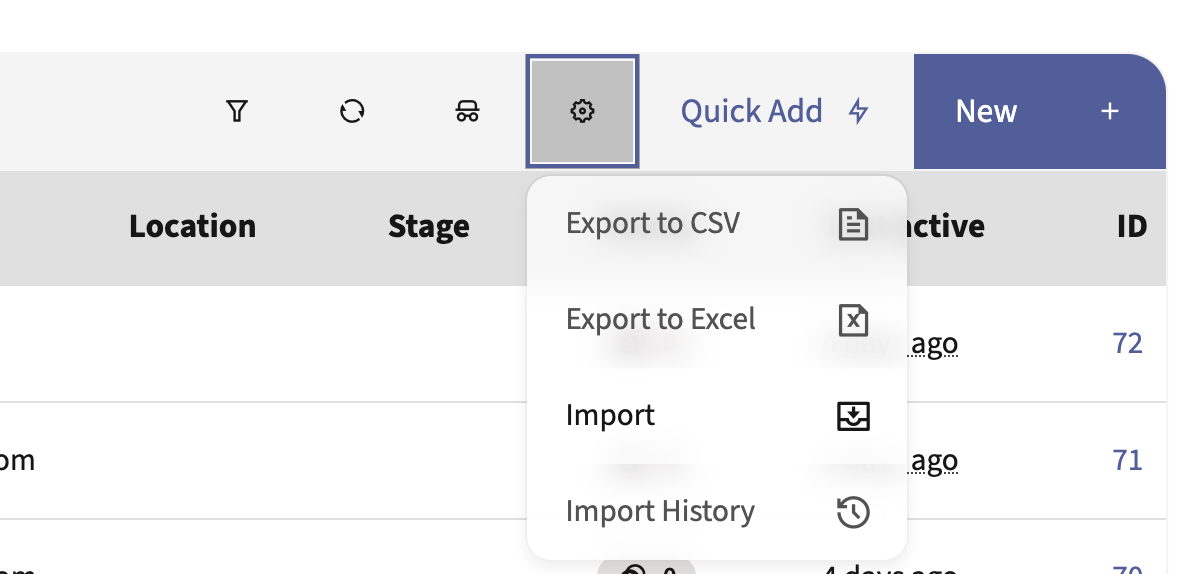
- Upload your CSV and map the columns to the right fields.
- Choose whether to add tags, or add members to segments, during the import. For now, it's best not to add members to segments automatically, so you can try out your segment logic separately.
- Run the import.
- An import usually takes 15 to 30 minutes, depending on the file size. You can follow its progress in Import History (see the screenshot above).
Advanced import options
Once you're comfortable with basic imports, these tricks help in more advanced cases, until member sync is available. You won't need them for every import.
Adding several tags per member
Tags are a good way to add useful CMS information to members, such as the groups or organisations they belong to, their role, or custom profile tags. You can then use them in segment filters. You can add tags in bulk in two ways. The examples below add the groups a member belongs to as tags, but the same works for other information.
- Filter your export before uploading. To tag the members of one group, filter on that group in the People overview of your CMS. Import those members into Engagement Studio and add a tag (for example, the group name) to all of them. This is simple, but you have to repeat it for every group or tag.
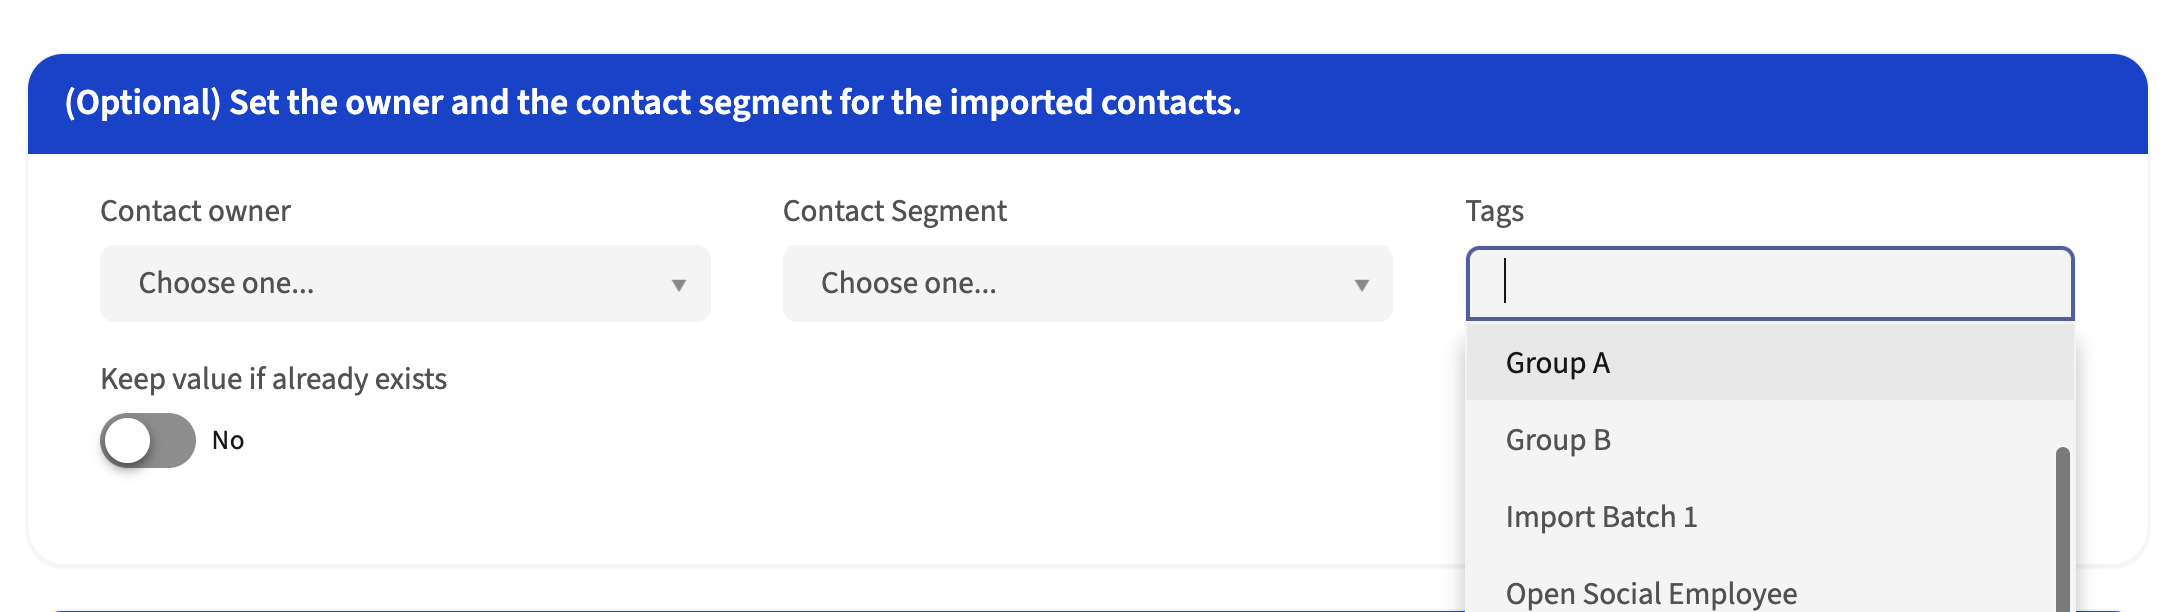
- Map a field to Tags. For bigger updates, such as tagging every member with all their groups, map a field to Tags during the import. For example, map Group Memberships (specified) to Tags:
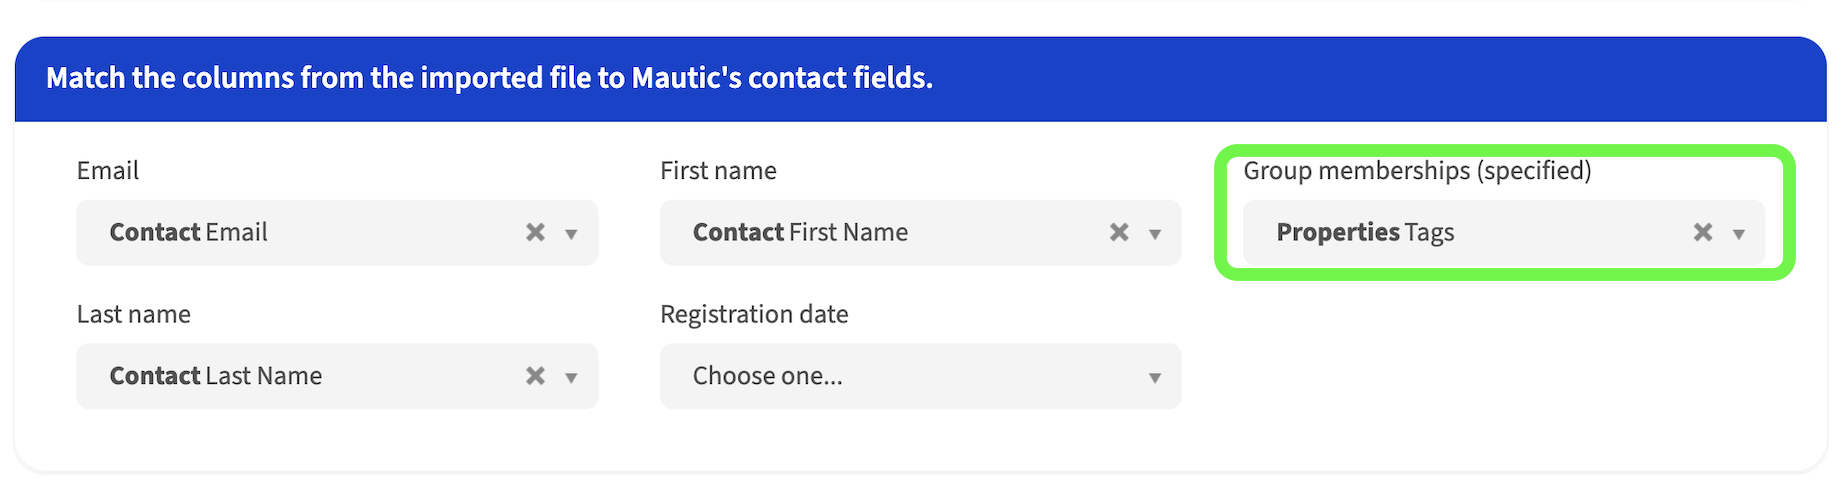
Several tags in one field (for example, a member of several groups)
Engagement Studio needs a pipe | between tags, not a comma. So you need to change the format in your CSV first. To convert a comma-separated list in Google Sheets (with the group memberships in cell J2), use:
=SUBSTITUTE(J2, ", ", " | ")
Map this new column to Tags during the import. Each group then becomes a separate tag, so members can have several group tags. If everyone belongs to only one group, you can skip this step.
Setting your own identified date
By default, imported members get today's date (the import date) as their identified date, which may not be their real registration date. To import your own date, format it as YYYY-MM-DD HH:MM:SS (24-hour time).
For example, if the registration date in cell J2 is in MM/DD/YYYY - HH:MM format, use this formula in Google Sheets:
=TEXT(DATE(MID(J2,7,4), MID(J2,1,2), MID(J2,4,2)) + TIME(MID(J2,14,2), MID(J2,17,2), 0), "yyyy-mm-dd HH:MM:SS")
Then map this new column to Identified Date during the import.
Summary
- Keep imports simple and clean: edit in Google Sheets and export as CSV.
- Use imports to add or update members in bulk, especially for tags, segments, organisations and roles.
- The formulas for several tags and for dates are optional, for more complex cases.
- Once member sync is available, these workarounds should no longer be needed.
Example
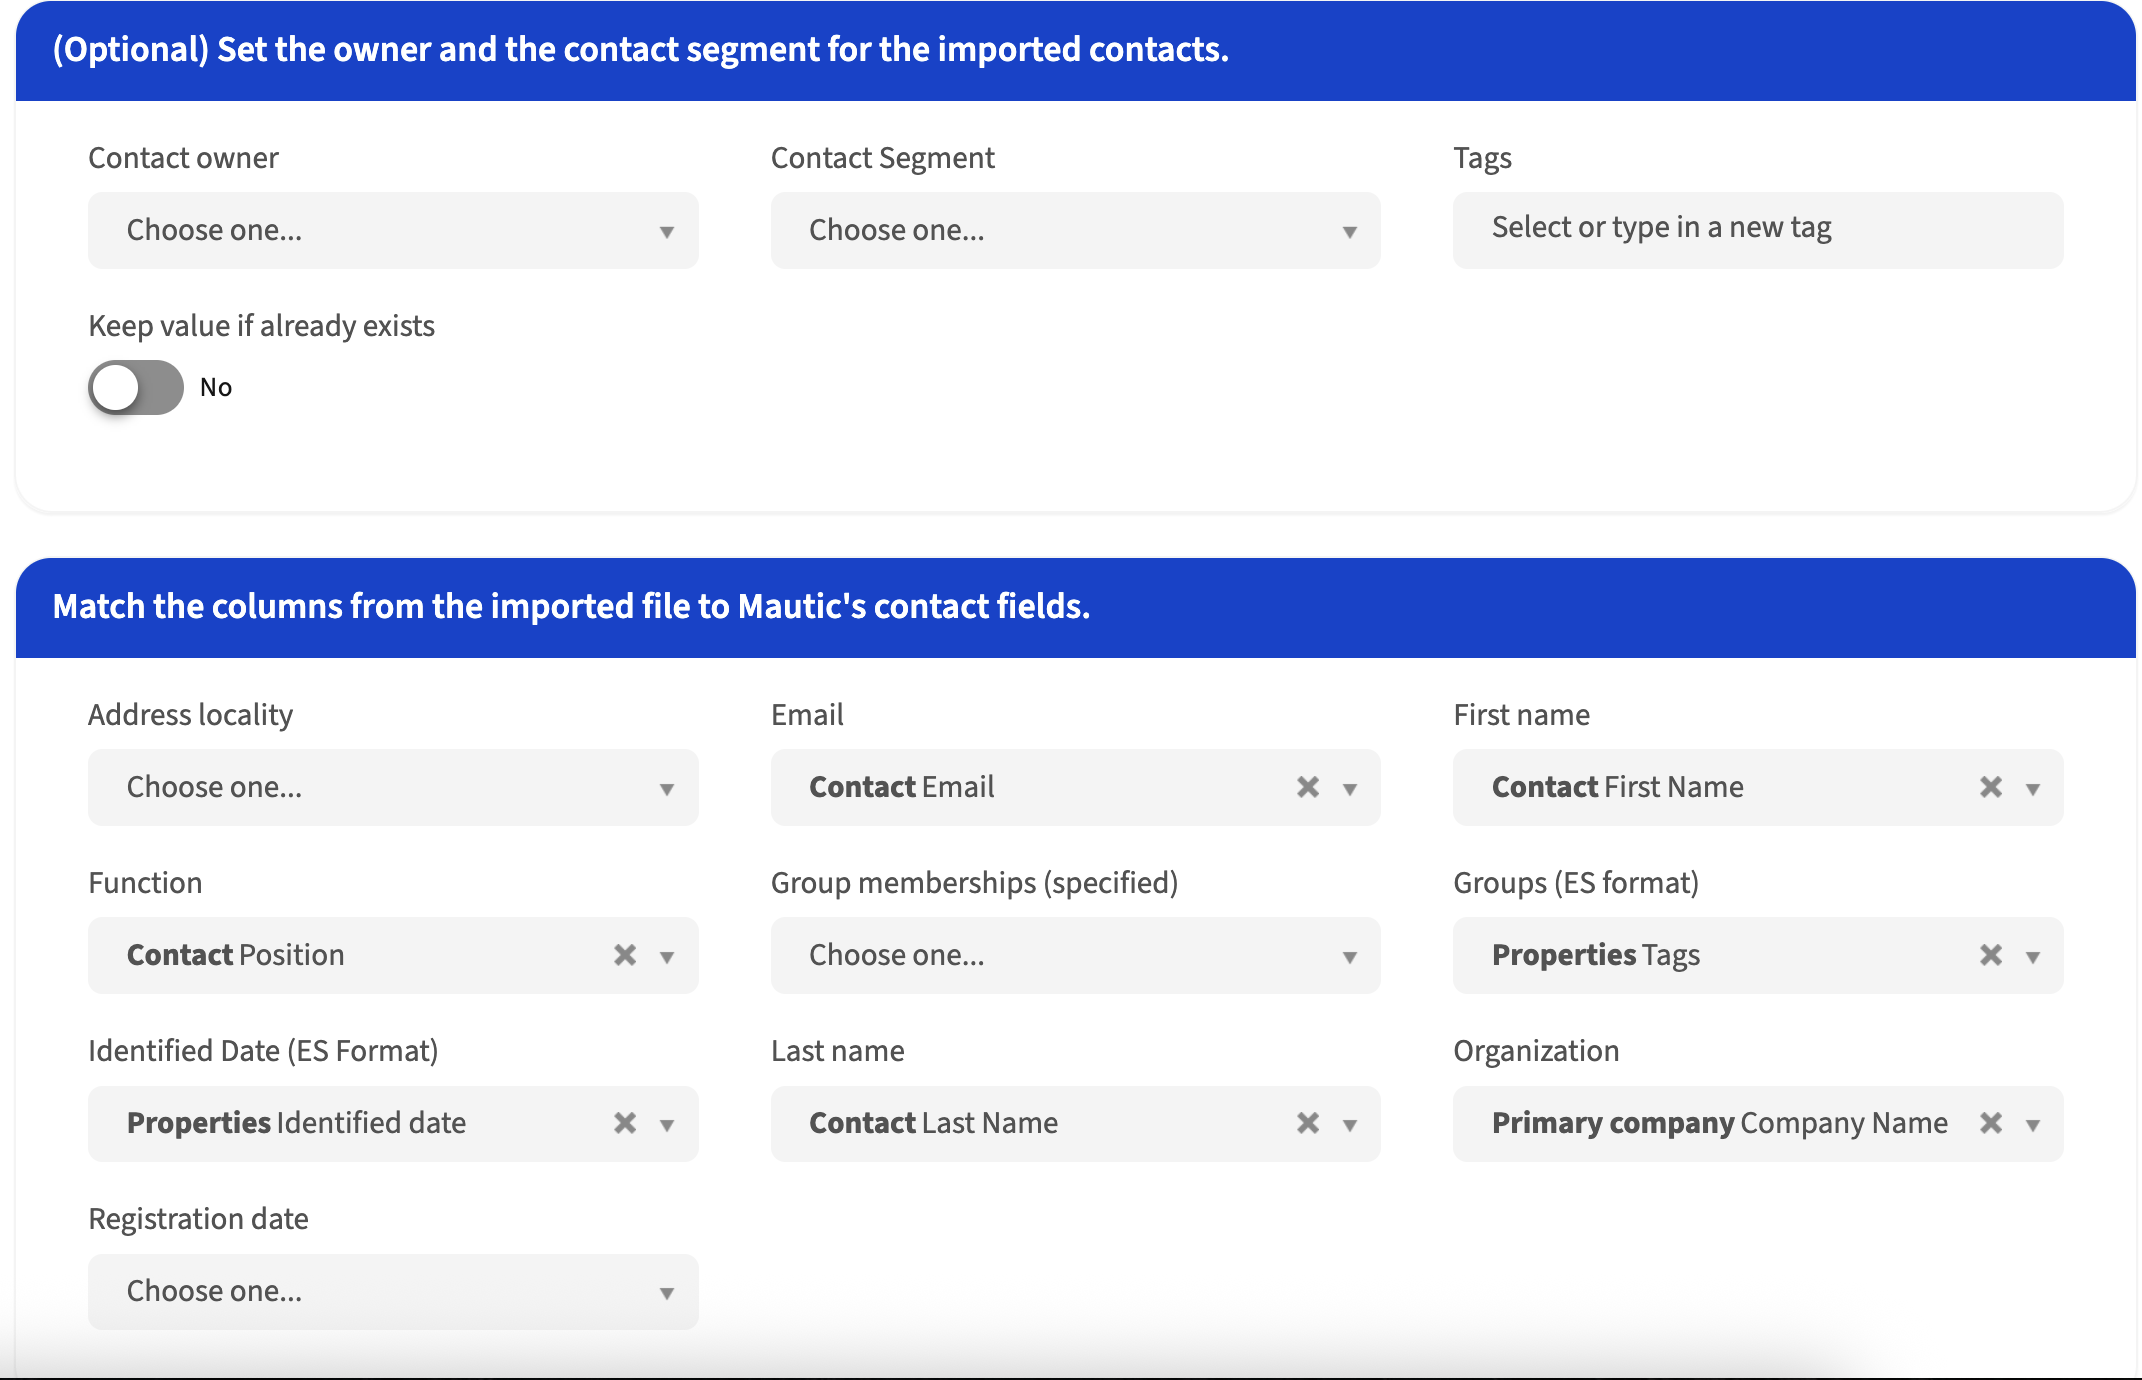
The CSV attached below is an anonymised export of Community Talks members. It shows the formulas above in action.
← Previous: Segment recipesNext: Channels →
